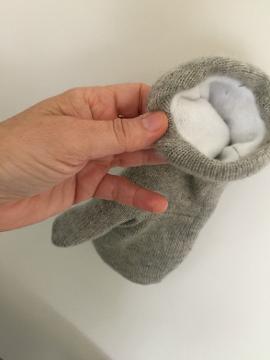
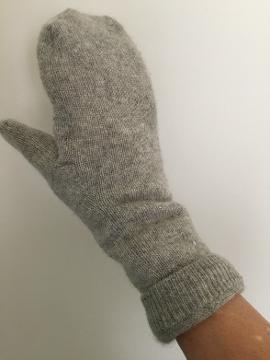
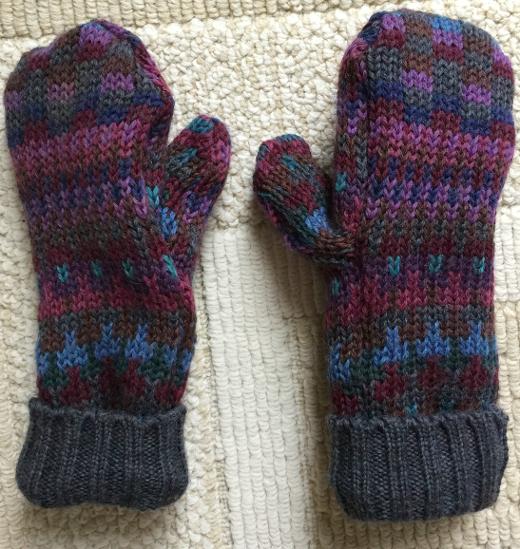
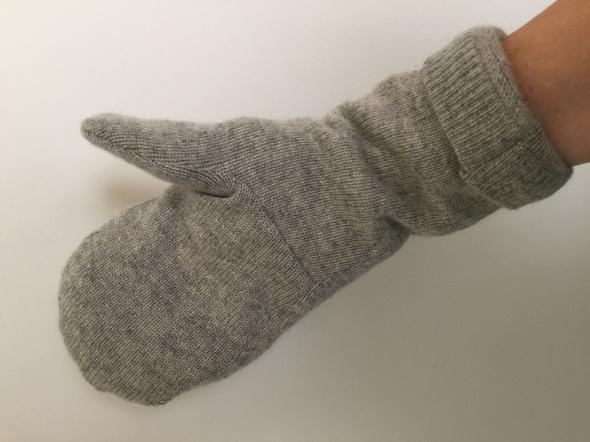
Here is a creative way to use the good parts of old sweaters. There are usually large sections that are still very nice and don't have any holes or stains. Cut them up and make these very warm mittens! They are lined with fleece so are soft and warm, inside and out.
Click on the pdf file to the right for instructions ------------------->

|
Upcylced Mittens Instructions.pdf Size : 26548.651 Kb Type : pdf |
The videos below have a lot of helpful information. I made the gray mittens from a cashmere sweater and there was no fraying and it was easy to sew. If you are making mittens from a wool sweater that has thick yarn, it is best to wash the sweater in very hot water to shrink the fibers.
There is a link on this video for the templates but if you print it out, it will be too small unless you make it "fit to page".
Here's another video which goes a little slower and has more detail.
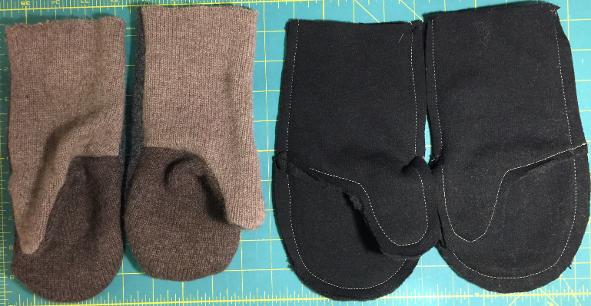
The fleece pair stays wrong sides out so you can slip it into the wool pair which is right sides out.
Here are some instructions. For more detailed instructions with lots of photos, click on the pdf file above.
Cut the sweater up into large pieces but first trim off the cuffs, waistband and possibly the neck line as follows:
Tip: Before cutting out the pieces, check for holes or stains in sweater and fleece so you can avoid them.
Cuffs
Trim off waistband, neckline and cuffs from the sweater about a 1/2 inch above ribbing (or if ribbing is less than 2 inches, cut 3 inches from end of cuff)
If you need to make a cuff (rather than using a cuff from the sweater), take the waistband or neck line strip and cut an 8 inch length of it (the strip should be 3 inches wide). Fold this in half right sides together and sew a 3/8 inch seam. If the wool is thick and bulky using a long stitch length will make it easier. Trim excess seam allowance. Turn it right side out. Now you have one cuff. Make two cuffs.
Pin the 3 templates to the wool sweater layering one template on top of two pieces of sweater - have one piece of the sweater right side facing up and the other one right side down as you layer them - this is important! You are cutting out 2 pieces per template. Do the same with the fleece (which will be the lining of the mitten).
Take one of #1 and place it on top of one of #2 layering it so the thumb on one lines up over the thumb on the other. Do this with the remaining #1 and #2 pieces. Both sets of the wool pieces must be sewn right sides together, (which become the "palm side pieces") but the fleece pieces must be sewn wrong sides together (so that the soft furry side will be what you feel on the inside of the mitten). Sew only along the dashed line! - stop where the notches are and back tack.
Clip the seam allowance and then turn the palm side pieces, right sides out. Place each palm side piece right side against right side of piece #3 which is a "back of hand" piece. You might want to use a safety pin to pin the thumb towards the center. Hiding the thumb prevents you from sewing it into the seam. You don't need to pin the thumb when you are working with the fleece pieces though, because you are sewing the fleece wrong sides together and the fleece thumb will be sticking out on top, not hidden inside.
Pin and sew all around except for the bottom edge. I like to use a Wonder clip where the outside edge of the thumb needs to be sewn to the back piece because you have to be careful there.
Trim the seam allowance and then turn the mittens right side out but keep the fleece linings wrong side out.
Put a fleece mitten on your hand (still wrong side out) and slip the wool mitten over it. Trim the the raw edges if fleece is longer than wool or vice versa. Slip the cuff (keeping it right side out) inside the mitten. Make sure that the finished edge goes in first so that you will now have three raw edges to sew: the wool mitten, the fleece and the cuff (wool). Sew carefully and then pull cuff out from mitten and fold over.
Sew a couple of stitches by hand on each side of each cuff to prevent cuff from unfolding.