2018 - Quilted Slouch Bag
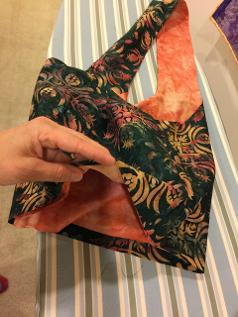
I made this Slouch bag from a poorly written online pattern. I am really proud that I figured out how to sew it! It is reversible but I think it looks best if you use a large print for the outside and a contrast solid or in this case, a batik which reads as solid. There is no closure but click here to see the same bag quilted with a magnetic snap closure and 2 inner pockets. This style is light weight. The only interfacing I used was for the oval base. My instructions are below (scroll down to the purple box) The pattern I found online had instructions that were difficult to follow (click on the .pdf file because you'll have to get the shape and dimensions from that). Print them out and tape the pages together to make the pattern (When I printed it out, I still had to alter the dimensions to what the pattern specified).
For this slouch bag, I used 2 fabrics for the inside because I didn't have enough of the purple contrast print. I also like to use light fabrics inside a bag so I can see inside better!
Here are the pdf instructions which I found difficult to follow but you'll need the pattern so print it out. They printed out larger than the specified dimensions so I cut it down to size. The width is 18 inches as you can see in the above photo
.

|
Slouch bag ReversibleShoulderBagInstructionsPattern.pdf Size : 209.579 Kb Type : pdf |
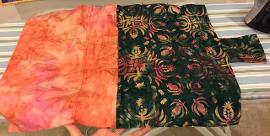
I used lightweight interfacing on the bottom oval which I cut from black twill. I folded the oval in half and cut out the lining and black twill piece on the fold (to make a symmetrical oval!). There are two gigantic pieces shaped like a capital I - one is the outer fabric and the other is the lining fabric (pieced in purple and light peach) - these are cut on the fold of a 42 inch width fabric and then you need to cut to more rectangles 18" by 8 3/4" and piece them together. You can see this easily on the purple/peach lining on the right.
Cut out all the pieces and sew the large rectangles to what looks like huge "Capital I" shaped pieces.
If you want a magnetic snap closure for this bag, apply small squares of interfacing to top corners of lining as shown.
2. Clip the curves.
3. Turn right sides out through the handle and press.
6. Turn right sides out and press. Press the seams open, then topstitch on each side of the seams, stitching through ONLY the main fabric of the bag and the seam allowance.
(If you want to put in a magnetic snap closure, you can still do it now, psition and insert it on lining where the small squares of interfacing will be the backing for it)

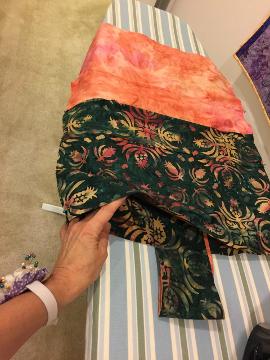
4. Now pull the unsewn fabric wrong sides out and let the handle portion stay right sides out. Position the handle so it lays flat and will stick out of one end.
Press the seam open where you see my fingers are pointing - only about 3 inches. Press the other side in the same way.
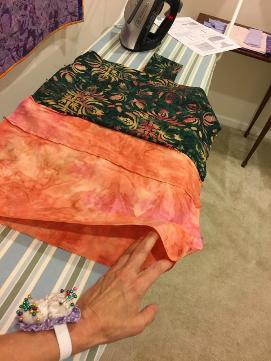
5. Now pin and sew the side seams of the bag, sewing the outer fabric to the outer fabric and the lining to the lining!
7. Now you can attach the black twill base to the outer fabric and the lining base to the inner fabric. This is done by gathering the bottom of the bag and pinning each oval piece to its corresponding bag bottom (outer and inner).


